Authenticity
How to Identify Real Nepali Rudraksha — A 2026 Buyer’s Guide
Water and milk tests prove nothing — X-ray does. Count mukhi lines correctly, verify a mala bead by bead, and spot fake 1 Mukhi before you pay a rupee.
By Kathmandu Rudraksha · Published 12 May 2026 · Updated 10 August 2026
Last reviewed: August 2026 · Kathmandu Rudraksha
Real rudraksha vs fake: why authenticity is the whole game
We sort rudraksha in Kathmandu every day — beads straight off trees in the Arun and Tamur valleys, beads brought in by growers, and, more often than we would like, beads bought elsewhere that someone asks us to look at. This guide is the checklist we actually use at the sorting table, written down. It is not a dictionary entry: every test here is one we run with our own hands, and two of the most famous tests you have read about are ones we will tell you to ignore.
Rudraksha is bought on trust. A genuine bead and a convincing fake can look nearly identical in a phone photo, yet differ enormously in price and provenance. Because so much of the trade happens through social media and messaging apps, the burden of verification sits with the buyer. The good news: a handful of physical and documentary checks rule out the overwhelming majority of fakes — and if you want our eyes on your bead, send photos for a free check, whoever sold it.
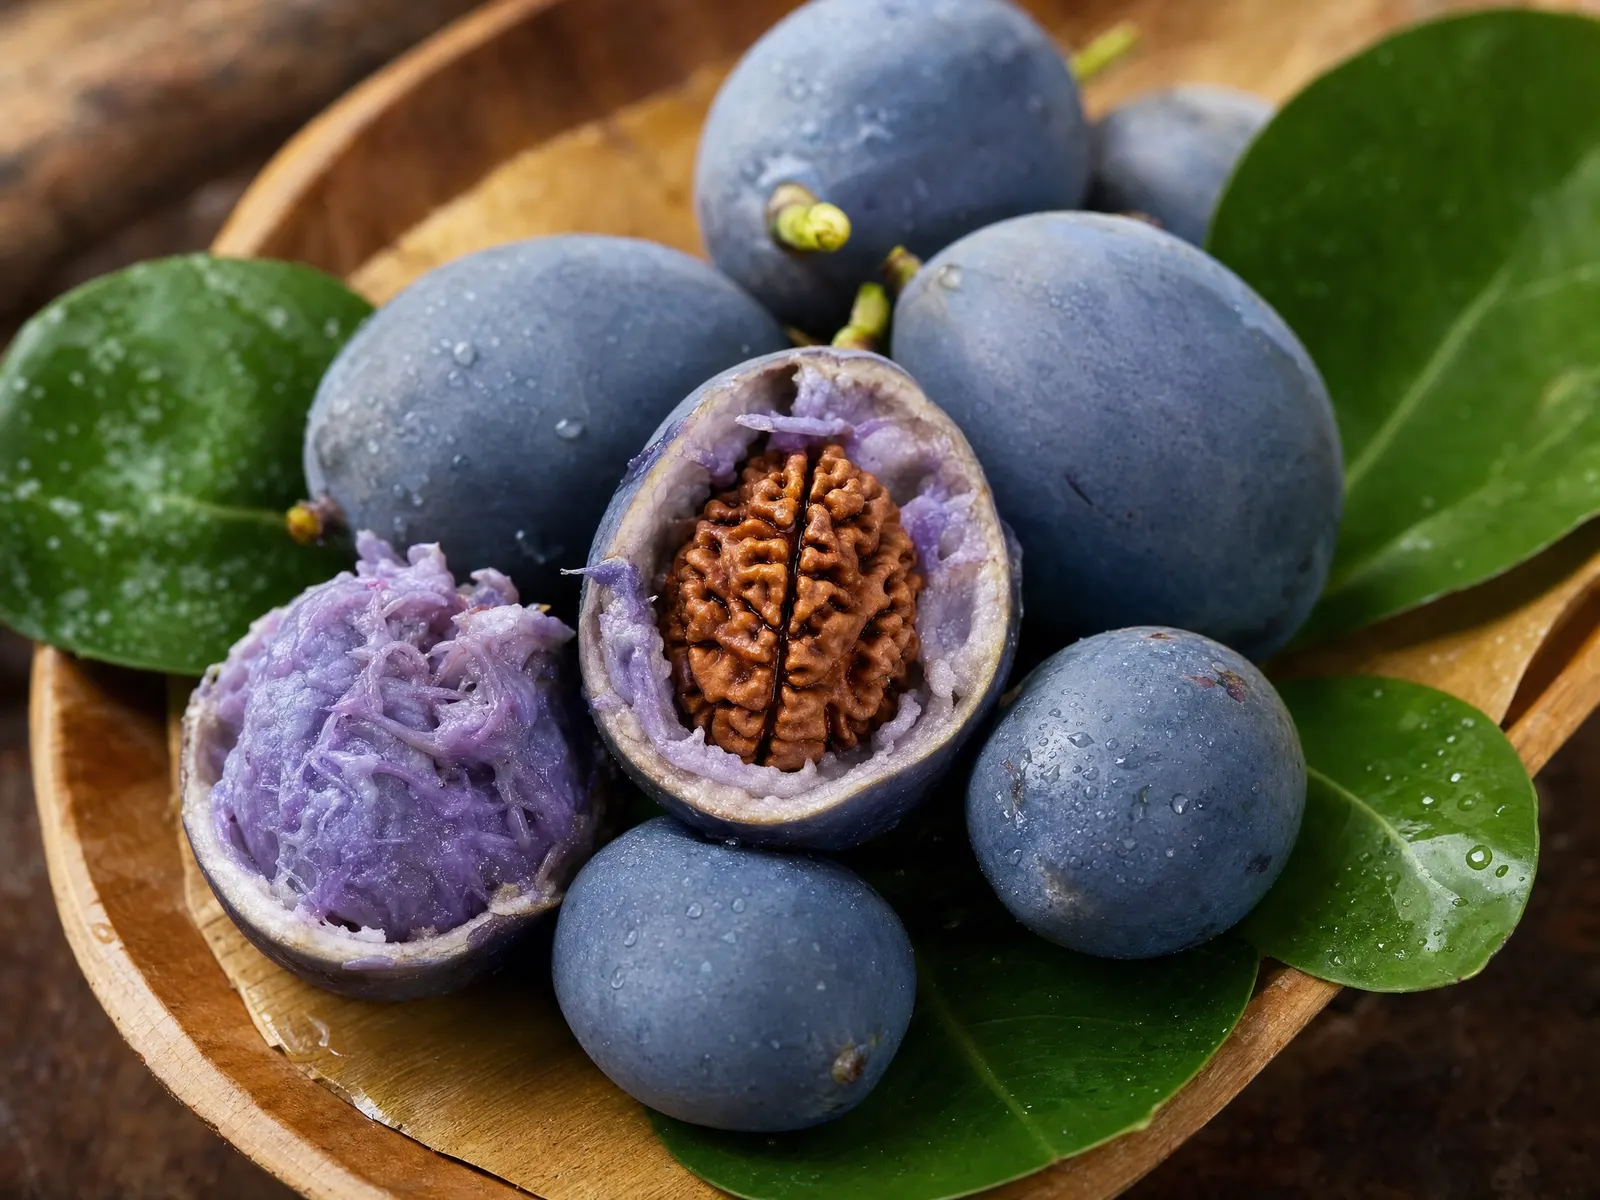
Treat authenticity as layered. No single test is decisive on its own, but several tests together give you strong confidence.
| What you are checking | Genuine Nepali bead | Common fake or upgrade |
|---|---|---|
| Mukhi lines | Unbroken clefts from top hole to bottom, uneven and organic | Carved grooves: too straight, too even, stop short of the holes |
| Surface | Irregular grain, pores, small natural blemishes | Waxy, uniform, over-polished; putty in the valleys |
| Seams and joints | One seed, no joins (Gauri Shankar: one natural fusion) | Glue lines, colour steps, two beads joined and stained |
| Water and milk tests | Proves nothing either way | Proves nothing either way — sellers cite it anyway |
| X-ray | Internal chambers match the mukhi count | Chamber count contradicts the carved faces |
The rudraksha tests that actually work: checks you can do yourself
Ridge depth and mukhi clarity
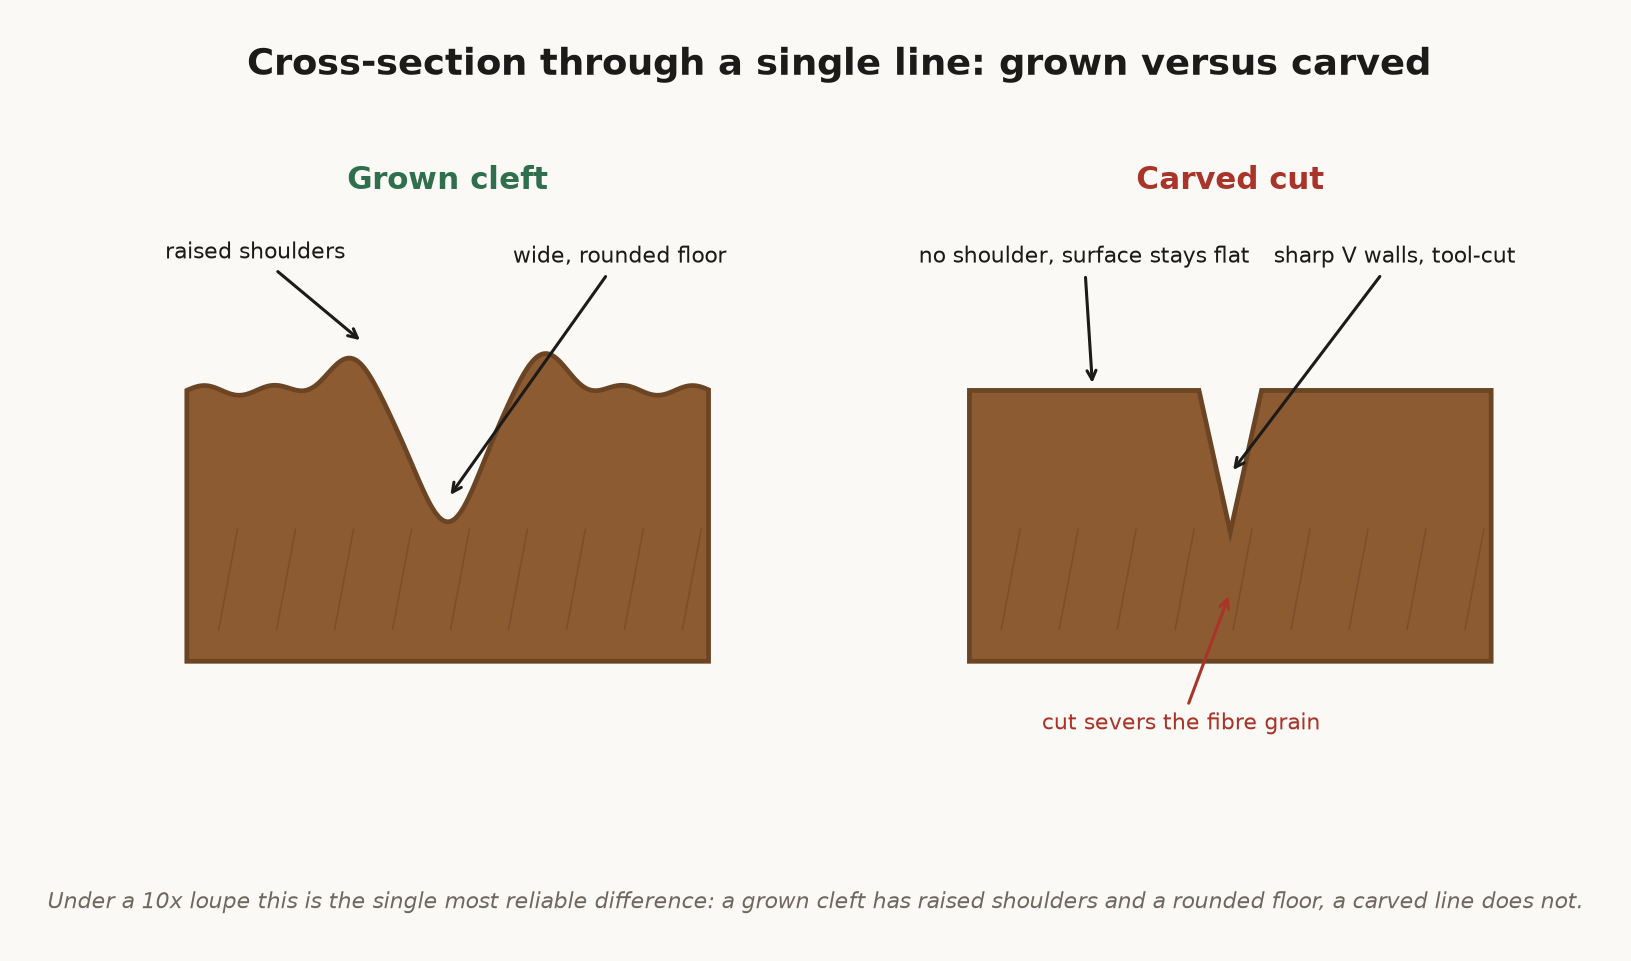
A natural Rudraksha has clefts (mukhi, or “faces”) that run from the top hole to the bottom hole as continuous, slightly irregular lines. On a genuine bead the ridges are deep, raised, and uneven in a way that looks organic. Carved or glued fakes show shallow, suspiciously uniform lines, or lines that stop before reaching the holes.
The rudraksha water test — and why it proves nothing
Many sellers cite the “sink or float” water test. It is only a weak signal: a real bead often sinks, but a dry, light, high-mukhi bead can float, and counterfeiters can weight a fake to sink. Use it as one data point, never as proof.
Surface and grain
Under good daylight, a real bead shows natural colour variation and a fibrous grain. A glossy, perfectly even surface can indicate heavy coating or a moulded resin copy.
Treated, polished and “enhanced” beads
Not every problem bead is a fake. A growing share of what we are asked to examine is genuine Elaeocarpus seed that has been worked on afterwards to make it more saleable — and the buyer was never told.
The mildest version is honest. Beads are cleaned, and a little oil after cleaning is normal practice that we and most careful sellers use. Nobody is defrauding anyone. Ours is the only account of a bead we can speak for, so the seven steps every bead passes through here are published in full — sourcing, sorting, the density and mukhi checks, the photograph you see before you pay.
The problem starts where treatment is used to fake quality rather than present it. Beads are dyed to deepen colour, because a rich reddish-brown sells better than the pale or greyish tone many genuine beads naturally have. They are polished aggressively to remove surface blemishes, which also softens the edges of the clefts and can turn a bead’s grooves shallow enough to argue about. They are waxed or lacquered to produce a gloss that seed does not have on its own, and that same coating conveniently fills small pits and hides hairline cracks. Grooves are sometimes tinted darker to make a low count look bolder, or to make a carved line look like it has depth it does not have.
Here is what to look for. Genuine cleaned seed has a soft satin sheen, uneven across the surface because the surface itself is uneven. A coated bead has an even, hard gloss that sits on top of the texture rather than following it, and it often looks slightly plastic in raking light. Look into the deepest part of a groove: pigment collects there on a dyed bead, and a colour noticeably darker in the grooves than on the ridges is a strong signal. Rub the bead firmly with a white cloth. Colour transferring to the cloth settles it. A chemical or solvent smell, particularly noticeable when the bead is warm in your hand, is a further signal.
A separate matter that we are asked about often: beads from plantations grown with heavy fertiliser and hormone treatment. These are real Rudraksha from real trees, and we want to be careful here, because the internet is full of confident claims about identifying them from photographs that we do not think are supportable. What can be said is that beads forced to unusual size with unusually smooth, shallow surface relief for their stated origin deserve questions. What cannot honestly be said is that anyone can reliably distinguish a fertilised plantation bead from a wild one by eye. Where a claim rests on provenance, ask for provenance, and treat certainty offered without evidence as a warning sign in itself.
Treatment is not always fraud. Undisclosed treatment always is.
How to check the mukhi count correctly
What actually counts as a face
A mukhi is a complete natural cleft that runs unbroken from the stalk hole at the top of the bead to the hole at the base. Only full pole-to-pole lines count. Faint surface scratches, partial grooves that die out halfway, and the decorative texture between the true clefts are not faces — and an honest seller will never count them as such.
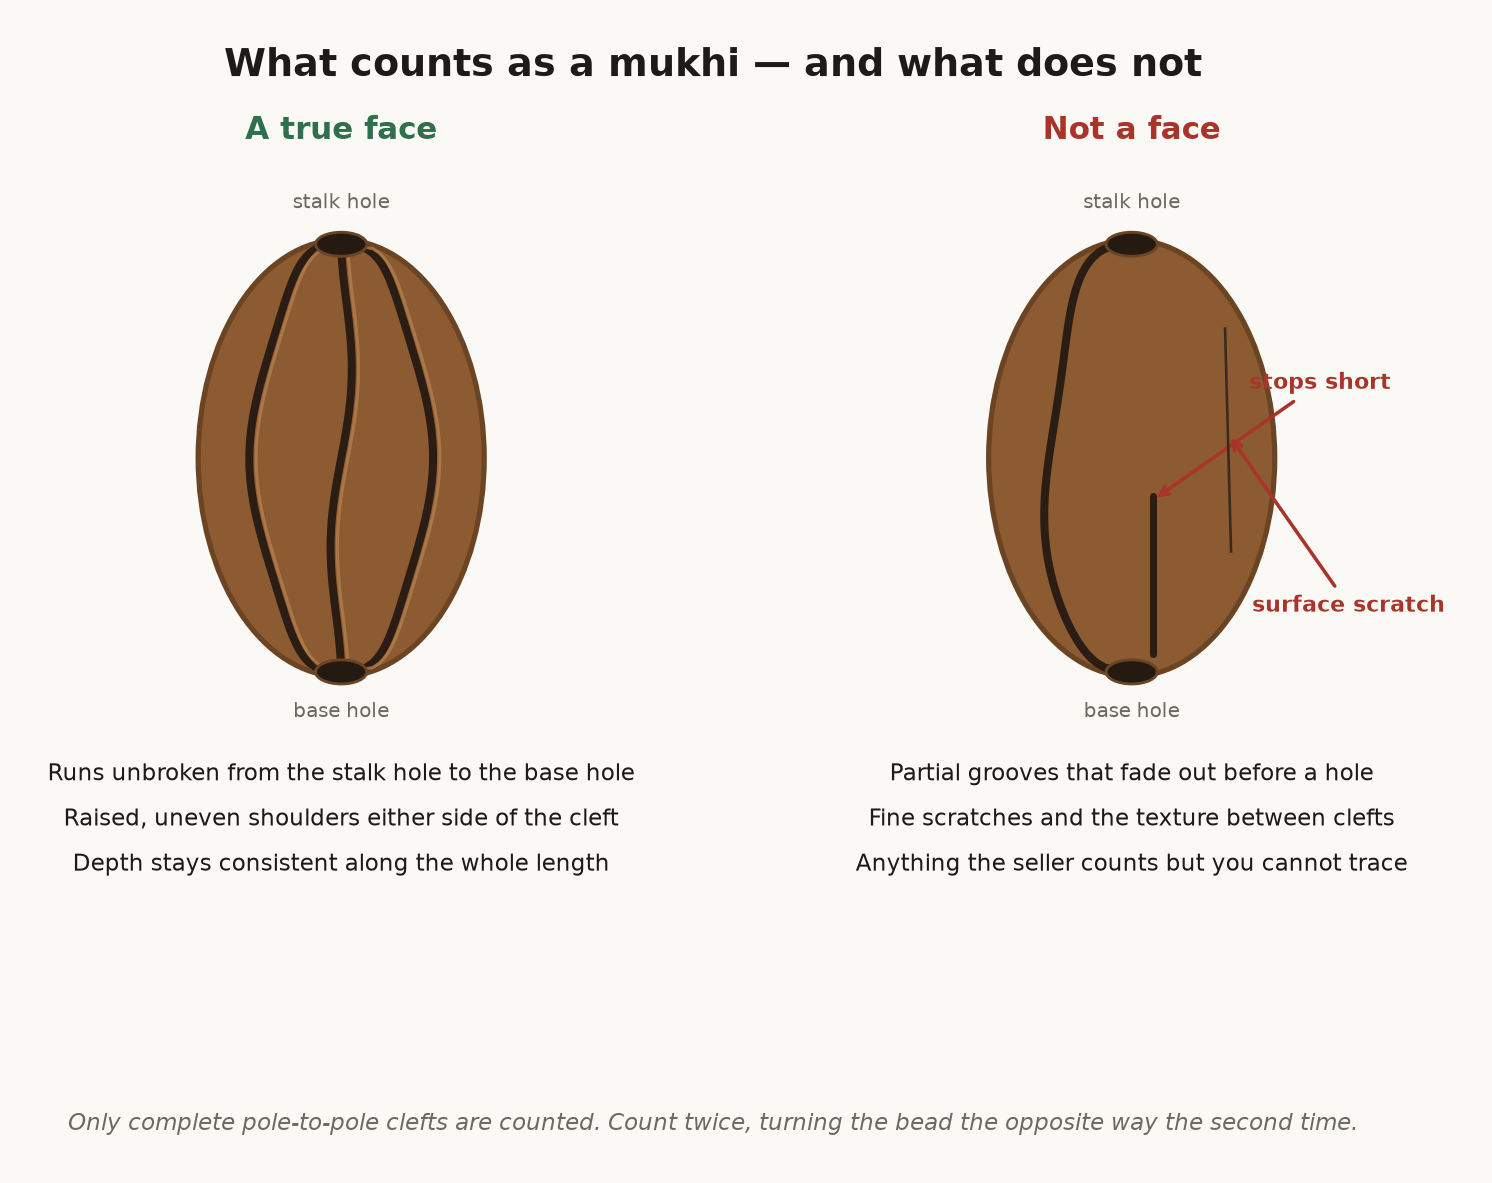
A counting method that works
- Hold the bead at eye level in daylight and find one clear cleft. Keep your thumbnail resting on it as your starting point.
- Rotate the bead slowly through one full turn, counting each complete pole-to-pole cleft until you return to your thumbnail.
- Count twice, turning the opposite way the second time. On a genuine bead the number does not change.
- If the lines are hard to read, a soft dusting of chalk powder settles into the true clefts and makes them legible. Rinse and dry the bead afterwards.
- A 10x jeweller’s loupe — a few dollars anywhere — shows at once whether a line is a natural cleft with raised, irregular shoulders or a carved cut with sharp, uniform walls.
The seller’s stated mukhi count and your own count must match exactly. “It reads as six but we grade it as seven” is not a nuance; it is the end of the conversation. And on any bead of real value, the final word is the X-ray, which shows one internal seed chamber for every true face.
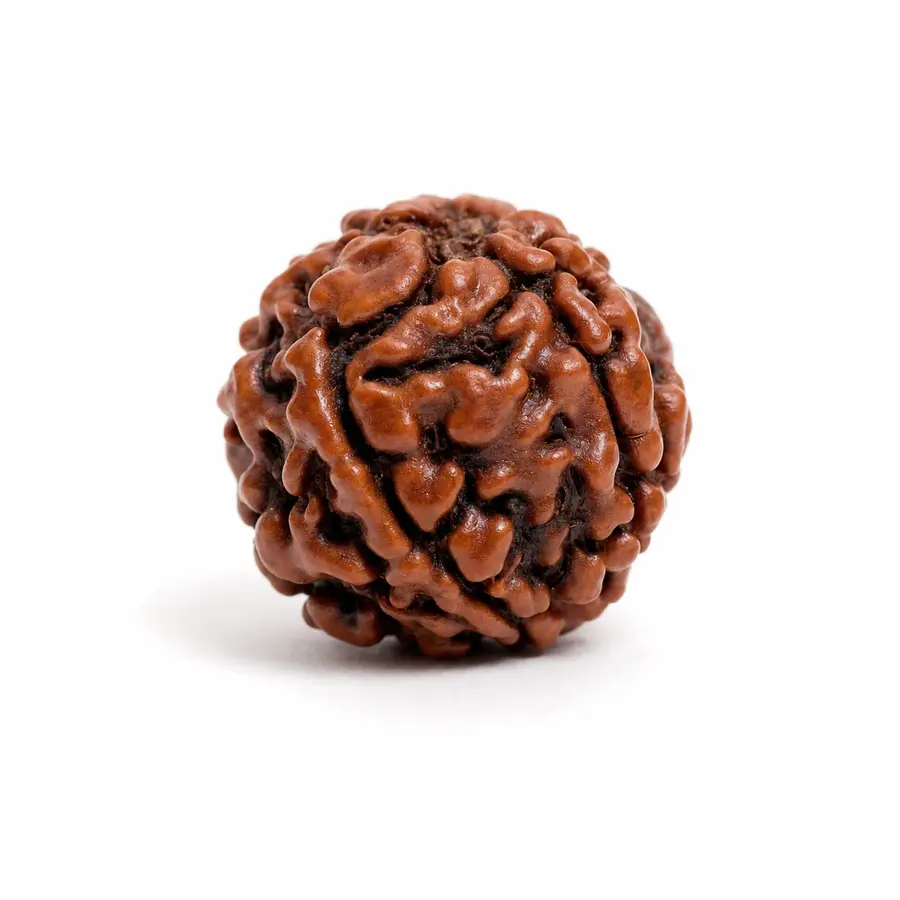
The checks only a lab can do
For higher-value beads — rare mukhi counts, Gauri Shankar, Trijuti — physical inspection is not enough. Two certifications matter:
- X-ray imaging shows the internal seed compartments. A genuine bead has the same number of internal compartments as external faces. A carved fake (e.g. a 5 mukhi cut to look like a 7) is exposed instantly.
- Lab certification (e.g. from a recognised gemmological lab) documents species, origin indicators, and any treatment.
We X-ray verify any bead in the full catalogue on request and photograph it before shipping. What that costs, which laboratory in Kathmandu does the imaging, and what the certificate you receive actually states are all set out in our verification process — worth reading before you pay anyone for a plate. If a seller cannot offer or explain X-ray verification on a high-value bead, treat that as a warning sign.
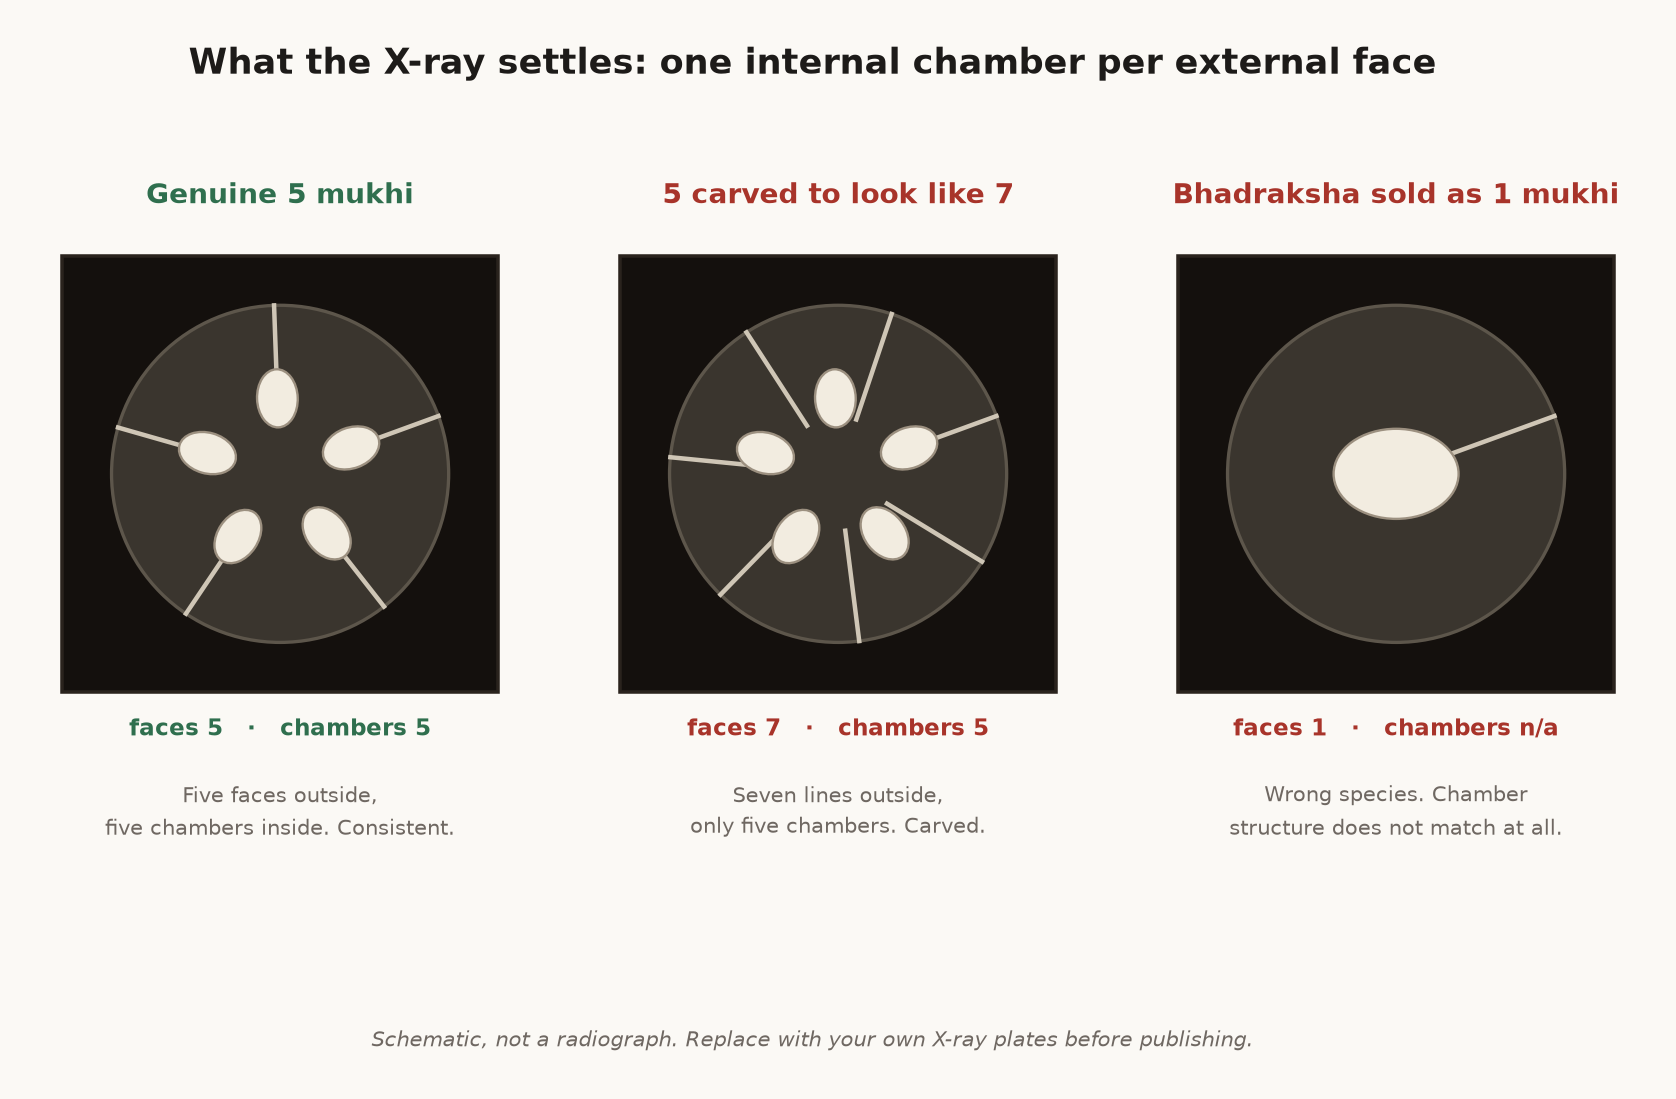
The figure above is a schematic drawing, not a radiograph. It is here to show you what to look for; the plates we send buyers are real images of their own bead.
Verifying a complete mala, not just one bead
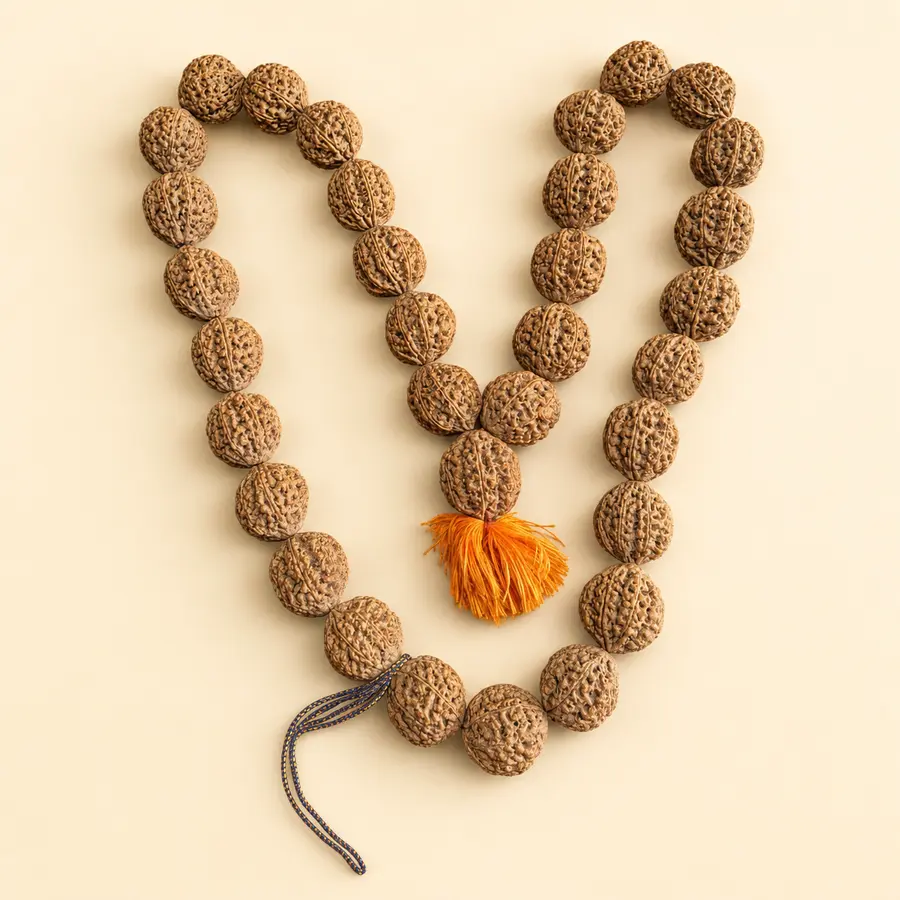
A mala is where fakes hide, because nobody inspects bead eighty-three. When you are checking a strand rather than a single bead, the method changes from inspection to sampling — and the sampling has to be yours, not the seller’s.
- Count the beads first. A japa mala is 108 plus the bindu (the guru bead); a kantha follows its stated count. A short count is carelessness at best.
- Pick ten to fifteen beads at random — including several nearest the bindu and several from the back of the strand — and run the single-bead checks on each: cleft depth, pole-to-pole lines, natural surface grain.
- Distrust perfect uniformity. Natural beads from one harvest are siblings, not clones; a strand of visually identical, machine-smooth beads is a strand to question.
- Look closely at knots and metal caps. Knotting is traditional and correct, but knots and caps are also where cracked, plugged, or joined beads get hidden. Slide them where the stringing allows and look underneath.
- In a mixed mala, ask which beads are Nepali and which are Indonesian. Combining them is legitimate when it is disclosed — a Nepali centrepiece with smaller Java beads is a classic design — and misrepresentation when it is not.
For a Siddha Mala or any high-value strand, ask for bead-by-bead verification — on the rare counts, an X-ray plate per bead. We photograph, and X-ray on request, before any such mala leaves Kathmandu.
High-risk beads: 1 Mukhi, Gauri Shankar, and “upgraded” counts
The 1 Mukhi original test: the most-faked bead of all
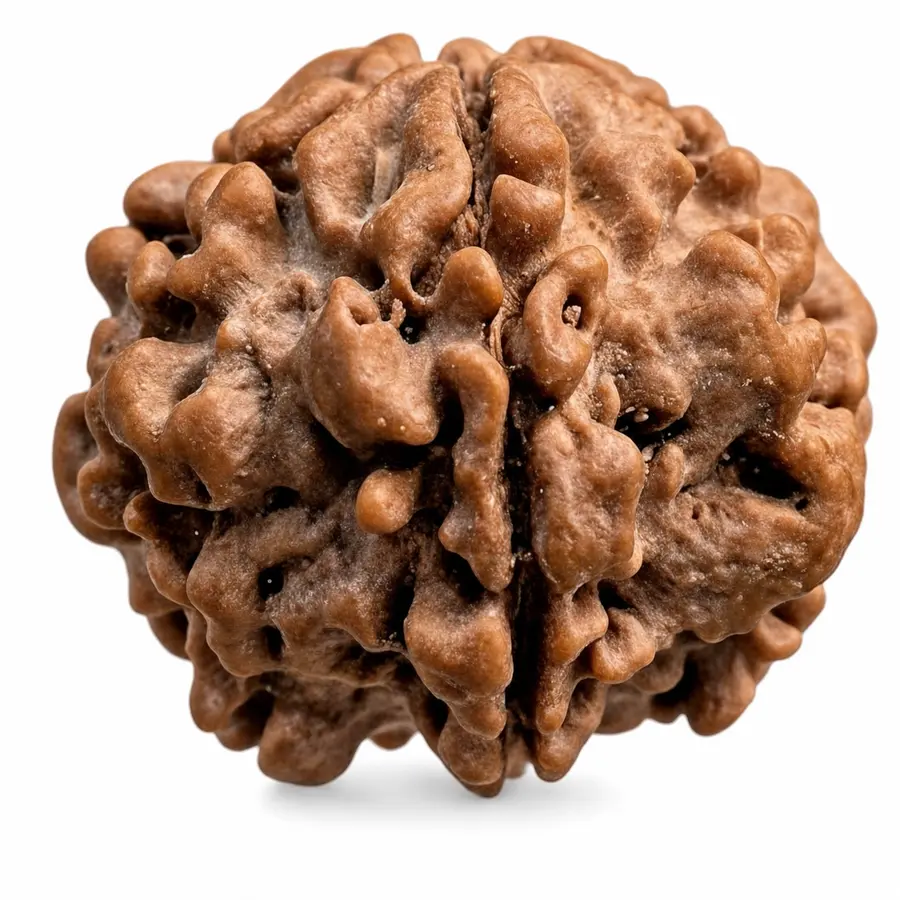
A round Nepali Ek Mukhi is so rare that most beads offered as one are something else. A legitimate, distinct item does exist — the half-moon (kaju-shaped) 1 Mukhi from southern India — and it is honest when sold as exactly that, at its own price, never at round-Nepali prices. The test that settles every 1 Mukhi question is the X-ray: a true Ek Mukhi shows a single internal seed chamber. A fake carved down from a larger bead betrays its extra chambers instantly.
Gauri Shankar — where glue does its best work
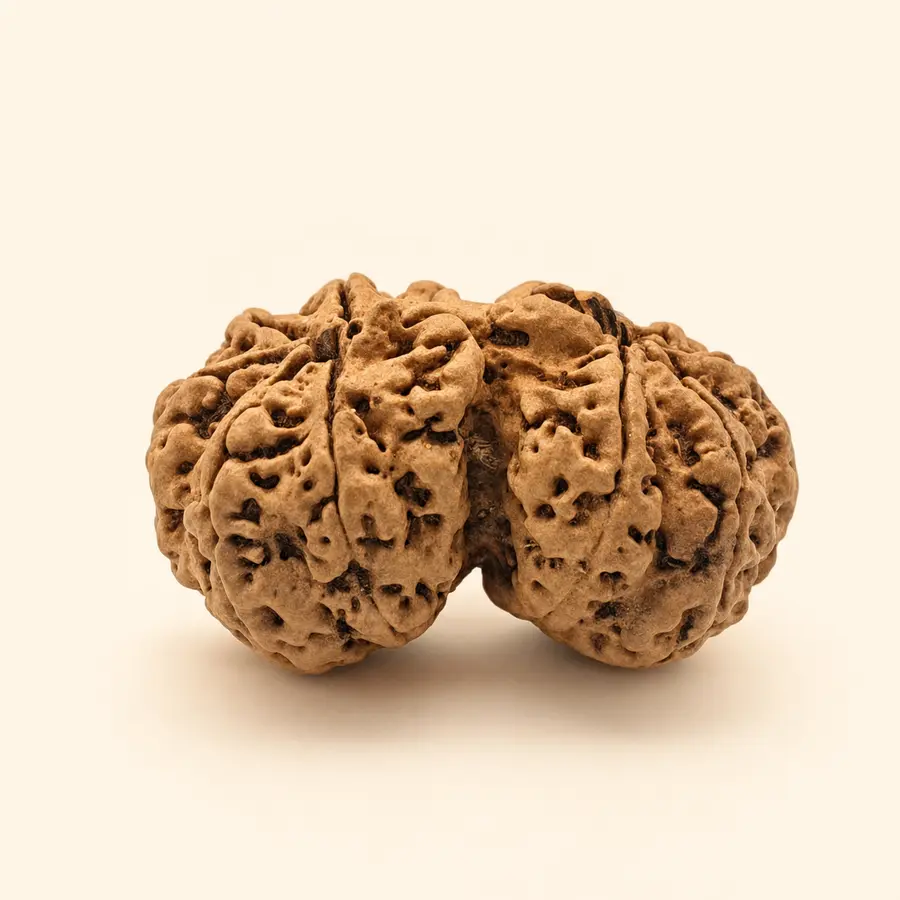
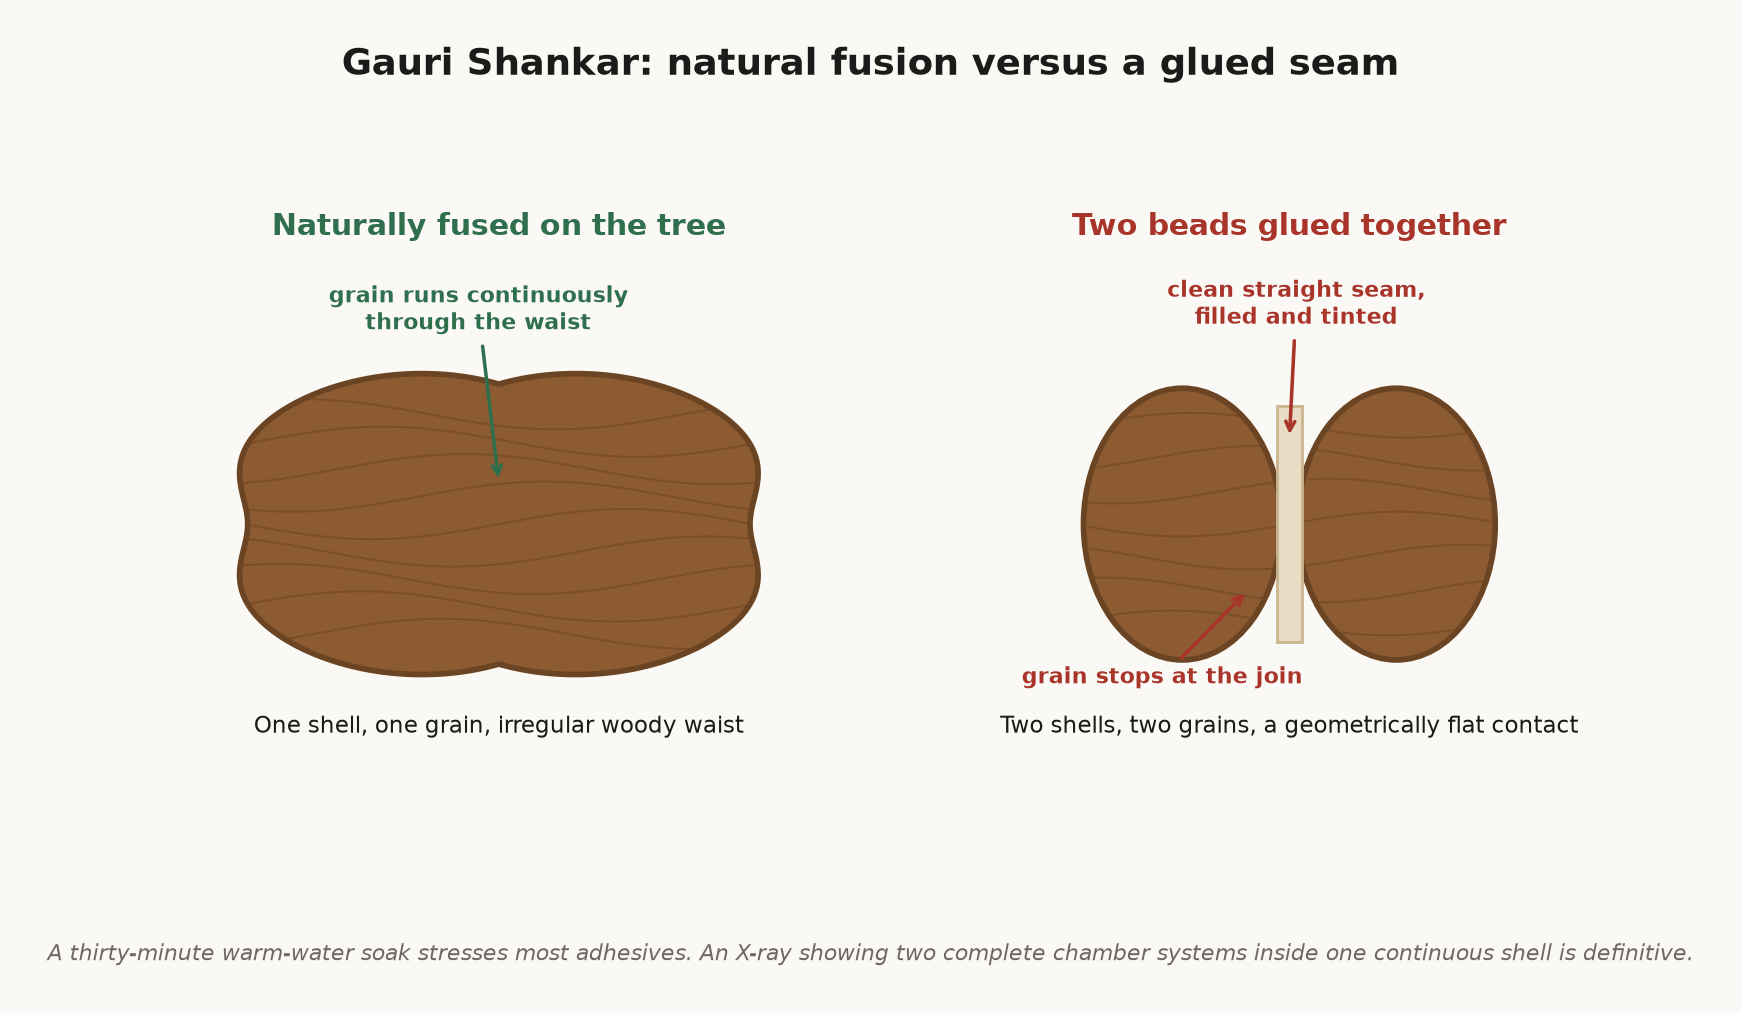
A true Gauri Shankar is two beads naturally fused on the tree, the tissue continuous through the junction. The common counterfeit is two ordinary beads glued at a flattened seam. Study the junction under magnification: natural fusion is irregular, woody, and of one grain; a glue joint reads as a clean seam, often filled and tinted to match. A warm-water soak stresses most adhesives — and the X-ray settles it, showing two complete internal chamber systems inside naturally continuous shells.
“Upgraded” common beads
Everyday counts like 5 and 6 Mukhi are rarely faked outright — genuine ones are too inexpensive to bother. The trick instead is carving extra lines into a 5 to sell it as a 6, 7, or 8. Carved additions give themselves away: shallower than their neighbours, sharper-walled, suspiciously straight, and often failing to reach the poles. When one line looks different from the rest, believe your eye — and let the X-ray count the chambers.
A ten-minute check sequence you can run at home
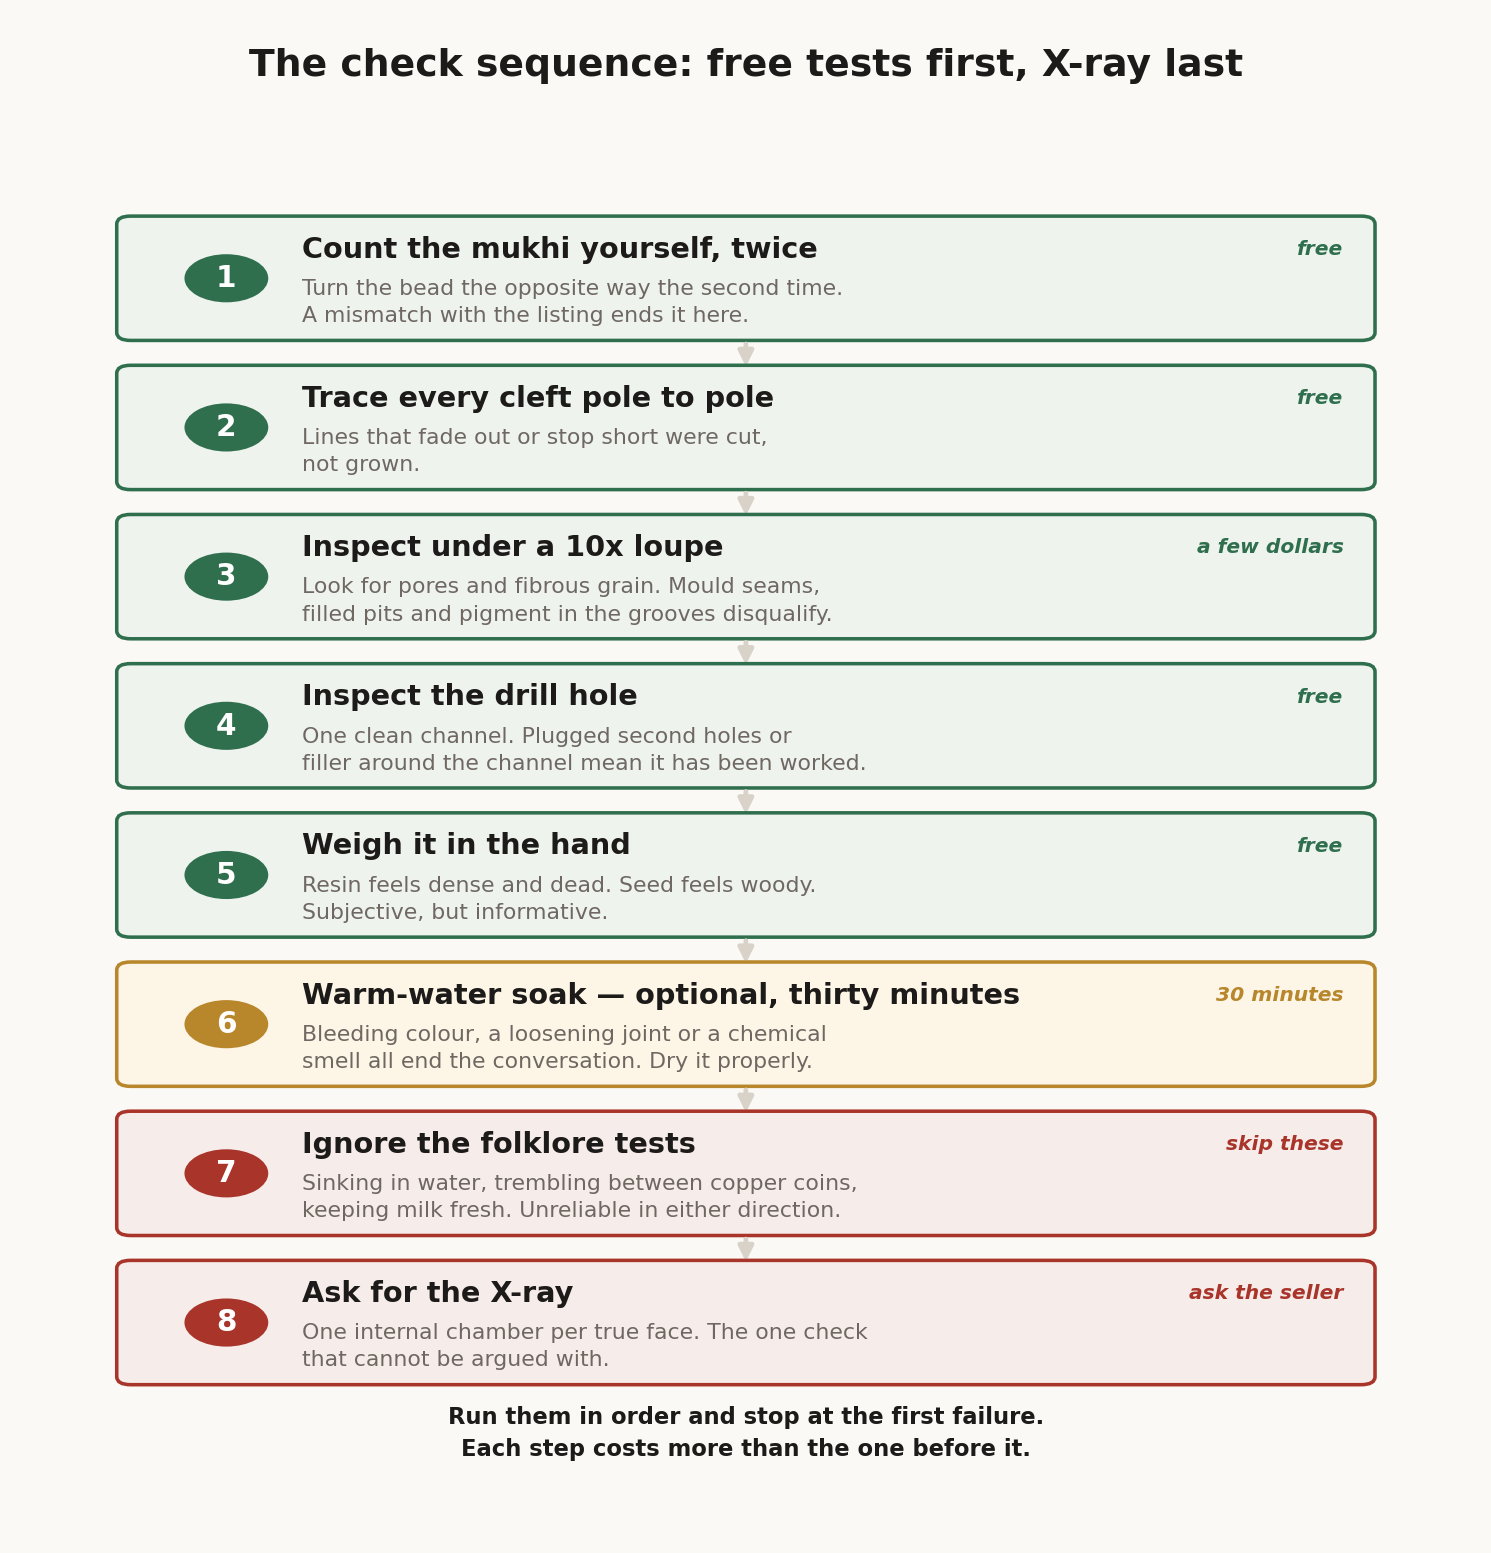
Order matters: run the free checks first, and let each result decide whether the bead has earned the next one.
- Count the mukhi yourself, twice, as described above. A mismatch with the listing ends it there.
- Trace every cleft from pole to pole. Lines that fade out or stop short are carved, not grown.
- Under a loupe, look for natural pores and fibrous grain. Mould seams, filled pits, and pigment sitting in the grooves are disqualifiers.
- Inspect the drill hole. A natural bead is drilled once, cleanly; plugged second holes or filler around the channel mean the bead has been worked on.
- Weigh it in the hand against a wooden bead of similar size. Resin feels dense and dead; genuine seed feels woody and alive. Subjective — but you will feel it.
- Optional, and the one step that takes longer than the rest: a thirty-minute soak in warm (not boiling) water. Bleeding colour, a loosening joint, or a rising chemical smell all end the conversation. Dry the bead properly afterwards. Skip it on a first pass — the five checks above settle most beads on their own.
- Ignore the folklore tests — sinking in water, trembling between copper coins, keeping milk fresh. None is reliable in either direction.
- For anything beyond everyday value, stop testing and ask for the X-ray. It is the one check that cannot be argued with.
Counterfeit detection: red flags that should stop a purchase
- A price far below the market for that mukhi count — rarity has a floor.
- No willingness to show extra photos, video, or the actual bead you will receive.
- Glue lines, filled holes, or faces that fade out before the drill hole.
- Claims of medical cures. Rudraksha has deep traditional and spiritual significance; honest sellers do not promise to cure disease.
- Origin claims that cannot be supported when you ask follow-up questions.
Damage is not fraud
Buyers arrive at guides like this one primed to reject anything imperfect, and sellers exploit the confusion in both directions. Some talk buyers out of sound beads by implying every mark is evidence of tampering. Others sell genuinely damaged beads at undamaged prices because the buyer does not know what they are looking at.
Real seeds grow on real trees in real weather. The following are ordinary. Hairline cracks, often from drying, which may be stable for decades or may open. Khandit beads, where a face is broken or a section has chipped away — traditionally considered unsuitable for wearing, which affects price sharply, but not fake. Insect bore holes, small round channels from beetles that fed on the seed on the ground; the bead is genuine and the hole is honest history. Surface fungal marking, dark blotches from damp storage, usually cosmetic. Irregular shape, flat spots, and asymmetry, all of which are normal and in fact mildly reassuring, since perfectly symmetrical beads warrant more suspicion than lumpy ones.
What each of these should change is the price and the disclosure, not your judgement of authenticity. A seller who describes a hairline crack before you find it is telling you something useful about how they do business. A seller whose photographs are all shot from the good side is telling you something too.
The question to ask is not “is this bead perfect?” but “does the condition match the description and the price?”
When both beads are real and the price still is not
Not every way of losing money on a Rudraksha involves a fake. The most common overcharge we see involves two entirely genuine beads.
Nepali and Indonesian Rudraksha are both authentic Elaeocarpus seed. They differ in size, in the depth and boldness of the clefts, and in tone: Nepali beads run larger with pronounced grooves, Indonesian beads smaller with finer lines and a lighter colour. They also differ substantially in price, and an Indonesian bead sold as Nepali passes every authenticity test you can run because there is nothing inauthentic about it.
This is why origin should be stated explicitly in any listing, why “Himalayan” and “genuine” are not origin claims, and why a seller who cannot tell you which side of the border a bead came from either does not know or would rather not say. Neither answer justifies Nepali pricing.
Seen side by side the difference is obvious. Seen one at a time on a screen, it is nearly impossible — which is precisely why the substitution works. If you want to learn to tell them apart before you buy, we photographed the two side by side at matched counts and sizes.
Frequently asked questions
Does a real Rudraksha always sink in water?
No. The water test is only a weak signal. Genuine beads usually sink, but dry or high-mukhi beads can float, and a fake can be weighted to sink. Rely on mukhi clarity, ridge depth, and X-ray verification instead.
What does X-ray verification actually show?
X-ray imaging reveals the internal seed compartments of the bead. An authentic Rudraksha has the same number of internal compartments as external faces (mukhi). It is the most reliable way to expose a carved or glued fake.
Is a lab certificate necessary for every bead?
Not for common, lower-value beads where physical inspection is sufficient. For rare mukhi counts and special forms like Gauri Shankar or Trijuti, lab certification and X-ray imaging are strongly recommended.
How can I check if a Rudraksha is real at home?
Count the mukhi yourself, trace each line from the top hole to the bottom hole, inspect the surface and drill hole under a 10x loupe, and give the bead a brief warm-water soak to expose dyes and glue. No home test is absolute — for any valuable bead, ask the seller for X-ray verification.
How do I count the mukhi on a Rudraksha?
Only complete clefts that run unbroken from the top hole to the bottom hole count as faces. Rotate the bead slowly in daylight through one full turn, then count again the other way — the number should not change. A dusting of chalk powder settles into true clefts and makes them easier to read.
How do I verify a whole Rudraksha mala is original?
Count the beads first (a japa mala is 108 plus the bindu), then randomly inspect ten to fifteen individual beads with the single-bead checks — including beads near the bindu and under knots, where problem beads hide. On Siddha Malas and other high-value strands, ask for bead-by-bead X-ray verification.
How can I identify an original Gauri Shankar Rudraksha?
Examine the junction under magnification: natural fusion is irregular, continuous woody tissue of one grain, while a fake shows a clean glued seam, often filled and tinted. A warm-water soak stresses adhesives, and an X-ray showing two complete internal chamber systems in naturally joined shells is definitive.
Is the copper coin test for Rudraksha reliable?
No. A bead trembling or spinning between copper coins proves nothing, and neither does sinking in water or keeping milk fresh — these folk tests reject genuine beads and pass fakes. Careful inspection of the mukhi lines plus X-ray verification is the reliable path.
Does real Rudraksha float in water?
It may do either, and neither answer tells you anything. Whether a seed floats or sinks depends on how dry it is, how much oil it has absorbed and how old it is — not on whether it is genuine. Fresh genuine beads sink; well-oiled genuine beads float; so do many fakes. Anyone selling you a bead on the strength of a water test is either mistaken or counting on you being.
How do you test Rudraksha in water?
You do not, and we would rather say so plainly than describe a method we think is worthless. Soaking also does real harm: prolonged water softens the shell and lifts the natural oil, so the test can damage the bead it was supposed to vindicate. Test the mukhi lines with your eyes and a lens, and settle the question with X-ray, which shows the internal chambers.
Can a 5 Mukhi Rudraksha be fake?
Yes, and it is faked more often than people expect. The 5 Mukhi is the most common bead, so it is rarely faked for its own sake — it is faked by carving extra lines into it to sell it as a rarer, dearer count. That is why a suspiciously cheap high-mukhi bead is usually a 5 Mukhi with a knife taken to it. Under X-ray the chambers give it away: a genuine bead has one chamber per face.
How can I get an original Rudraksha?
Buy from someone who will show you the individual bead before you pay, and who will put it under X-ray if you ask. That is our own method: photographs and video of the exact piece you would receive, sent on WhatsApp, with independent X-ray available as a paid add-on. What matters is not the seller's wording but whether they will identify the specific bead you are buying — a stock photograph and a generic certificate identify nothing.
Where to go next
- Authenticity & verification
- Browse all Mukhi Rudraksha
- Rare Rudraksha
- Rudraksha Certificate and X-Ray: How to Verify Yours
- 5 Mukhi Rudraksha
- 7 Mukhi Rudraksha